Showing posts with label Snack. Show all posts

Friday, June 21, 2019

MyMusingsSangSpeak- Pet Puja- Rice Dhokla

Rice Dhokla
Rice Dhokla is much like the famous idli, except that curd is used here for fermentation. It has a distinct, slightly sour flavour because of the curd. I like this dhokla better than the besan (gram flour) dhokla. This dhokla is available at many outlets in Pune. I tried making it at home after reading it on the internet only recently and it turned out really yummy. You may use whole rice or idli rawa, whichever is readily available for this recipe.
Ingredients
Rice/Idli Rawa – 2 cups
Urad Daal (Split Black Gram without skin) – ¼ cup
Tuvar/Arhar Daal (Split Pigeon Peas) – 1 teaspoon
Chana Daal (Bengal Gram) – 1 teaspoon
Moong Daal (Green Gram split without skin) – 1 taespoon
Fenugreek seeds – ½ teaspoon
Water – As per requirement
Curds – 1 big cup
Salt – As per requirement
Soda Bi Carb – ½ teaspoon
Green Chillies – 2 nos
Ginger – 1inch piece
Oil – 2 tablespoons
Sesame seeds – 2 tablespoons
Mustard seeds – 1½ teaspoons
Asafoetida – A small pinch
Red chilly powder – ¼ teaspoon

Method
Wash and soak rice/idli rawa in water for 3 hours. Wash and soak all the daals together for 3 hours. After 3 hours, drain water from soaked rice and daals. Grind the soaked daals along with ginger and green chillies to a coarse paste, add curds if required and set aside. Grind the soaked rice/ idli rawa also coarsely with curds and add to the daal mixture. Mix well and set aside for fermentation for about 6-7 hours.
For cooking rice dhokla, take a flat-bottomed vessel and grease with oil. Add salt and soda bi carb to the rice dhokla mixture and mix well for about 2-3 minutes. Transfer the mixture to the greased vessel and steam cook for about 12-15 minutes in a pressure cooker without the whistle.
For tempering, heat oil, and add asafoetida and mustard seeds, once the mustard seeds splutter, add sesame seeds and remove from fire. Pour this on the cooked rice dhokla. Sprinkle red chilly powder on top. Rice Dhokla is ready to be served. Serve rice dhokla with chutney of your choice.
I made chutney with fresh cocnut, roasted groundnuts and roasted, puffed chutney daal.

Note- Preparation time is about 10 hours and cooking time is 25-30 minutes. 

Wednesday, June 12, 2019

MyMusingsSangSpeak- Pet Puja - Paatal Poha Chiwda (Rice Flakes Mixture Snack)


Paatal Pohyacha Chiwda (Rice Flake Savoury Mixture Snack)
Paatal Pohyacha Chiwda is a light, crispy, tasty snack that can be prepared very easily. You require thin rice flakes/puffed rice for this recipe, but, if these are not readily available, then one can use the normal poha too. With normal poha, the roasting time may increase. This snack uses very little oil; hence it is healthy in that respect.
This dish was never made by my mother. It was made by my aunt, and I liked it so I learnt to make it.


Ingredients
Paatal Poha (Thin rice flakes) – ½ kg
Groundnuts – 200 gms
Dry coconut (Thinly sliced) – 2 tablespoons
Cashews (broken) – 2 tablespoons
Chutney Daal – 2 tablespoons
Sesame seeds – 2 tablespoons
Mustard Seeds – 1 teaspoon
Cumin Seeds – 1 teaspoon
Curry Leaves – 15-20
Green Chillies (finely chopped) – 3-4 nos
Garlic (finely chopped) – 1½ teaspoon
Turmeric powder – ½ teaspoon
Oil – ½ cup
Salt – To taste
Asafoetida – A generous pinch

Method
Fry the groundnuts and set aside. Dry roast the rice flakes on medium flame till they become crisp and a light cream colour, add few drops of oil in between while dry roasting. Add salt, turmeric powder and fried groundnuts and switch off the heat.
For tempering take another utensil. Heat oil and fry cashews pieces, chutney daal, and sliced dry coconut very lightly and add to the rice flakes mixture. Fry the finely chopped garlic till it turns crisp and brown and add to the rice flakes. Add asafoetida, chopped green chillies, mustard and cumin seeds and allow the chillies to become crisp. Add this tempered oil to the rice flakes mixture along with the sesame seeds and mix well. Lightly roast the rice flakes mixture on low flame for about 8-10 minutes, till it becomes crispy by stirring continuously so that all ingredients mix well and the salt gets distributed evenly also. 
While serving, you may add finely chopped onion and fresh coriander.

Note - Similar savoury snack can be made with cornflakes or wheat flakes or any other puffed grains.


Tuesday, June 11, 2019

MyMusingsSangSpeak- Pet Puja - Dadpe Pohe


Dadpe Pohe (Soaked and Pressed Rice Flakes Snack)
Dadpe Pohe is a delicious, lip smacking recipe of uncooked, soaked and pressed poha with lots of fresh vegetables. Dadpe means pressed, and in this recipe,the poha is soaked and pressed for a while and used uncooked.  It is a nice summery treat, very easy to prepare too. Generally, thin puffed rice flakes are used for this recipe. In case, thin variety is unavailable, one can make use of the normal variety too, only soaking and pressing time would increase in that case.
It is poha (puffed rice) soaked in coconut water/curds or a mix of both, and finely chopped onions, tomatoes, grated fresh coconut, carrot and cucumber, salt, sugar, lime to taste n for tempering oil, curry leaves, green chillies, mustard seeds n asafoetida, for garnish -fried groundnuts, chopped coriander.
This dish was never made at my home, I had it at my college-mate's home and I got this recipe from his mother as I had really liked the taste.

Ingredients
Thin Poha/Rice Flakes – 2 cups
Curds/Yoghurt – 1 to 1½ cups
Onion – 1 large (finely chopped)
Tomato – 1 medium (finely chopped)
Grated Fresh Coconut – 2 tablespoons
Salt – As per taste
Sugar - 1½ - 2 teaspoons
Lemon juice – 2 teaspoons
Fresh coriander – 2 tablespoons (Finely Chopped)
Fried Groundnuts – 2 tablespoons
Oil – 2 tablespoons
Asafoetida – 1 pinch
Mustard Seeds – 1 teaspoon
Curry Leaves – 14-15
Green Chillies – 2-3 nos
Cumin Seeds (optional) – ½ teaspoon
Carrot – 2 tablespoons (grated)
Cucumber – 2 tablespoons (grated)

Method
Clean the Poha/rice flakes well by straining through a strainer. Add curds, salt, sugar, lemon juice to the poha and keep it pressed for about half hour in a vessel by covering with a plate with weight placed on it. Add finely chopped onion, tomato, grated coconut, fried groundnuts, chopped coriander leaves, optional vegetables like grated carrot and cucumber and mix well.
For tempering, heat oil in a vessel. Add mustard and cumin seeds, asafoetida, curry leaves, chopped green chillies, allow the mustard to splutter well and add to the prepared poha mixture. Give a good stir so that the tempering mixes well with the poha mixture. Dadpe Pohe are ready to be served.  


Wednesday, December 30, 2015

MyMusingsSangSpeak-Pet Puja - Thalipeeth

Thalipeeth
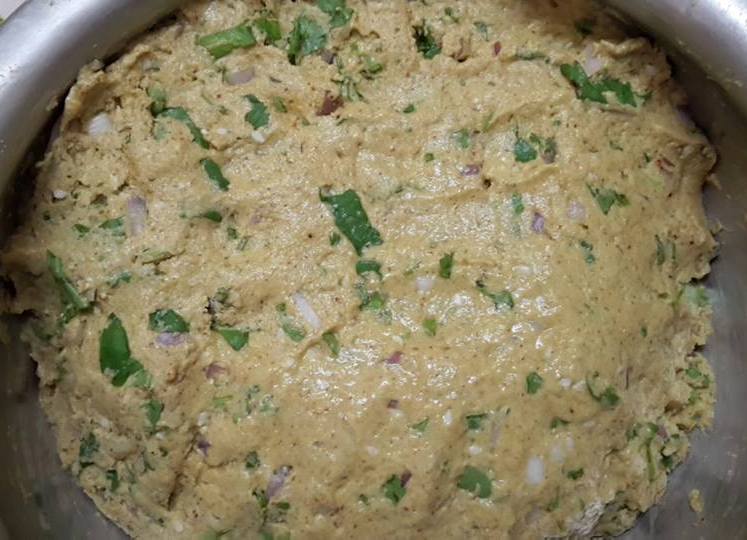
Thalipeeth is a very inetersting Maharashtrian delicacy, can be eaten as a snack or whole meal. It is multigrain recipe full of nutrition and also a lip smacking, tasty dish. Thalipeeth can be made in many different ways - you can mix different flours available in the kitchen or you can mix different grains, wash and roast after drying and grind them to form a multigrain flour mix (this is the bhajni thalipeeth). Thalipeeth essentially has lots of onion and fresh coriander in it lending it that unique taste. You can make varieties of thalipeeth by using leafy vegetables of your choice. Even if you do not have all the various flours at home, you can dish out a delicious thalipeeth with just three flours, that of wheat, Bengal gram and shorghum or rice.
I remember the yummy thalipeeths made by my mother, grandmother, aunts and other relatives. Each one tasted different yet delicious. One more memory associated is of the thalipeeth that was eaten during childhood on the cart that sold homemade Maharashtrian delicacies near Nataraj Theatre in Dr Madhumalati Gune Hospital compound in Deccan area of Pune.
Ingredients
Wheat Flour - 2 cups
Shorghum(Jowar) Flour - 2 tablespoons
Gram Flour - 2 tablespoons
Rice Flour - 2 tablespoons
Bajra(Pearl Millet) - 2 tablespoons
Corn (Makki/Kanees) Flour - 2 tablespoons
Onion - 1 large (finely chopped)
Fresh Coriander - 1 cup full, finely chopped
Cumin Powder - 1 teaspoon
Coriander Powder - 1 teaspoon
Red Chilly Powder - 1 teaspoon
Turmeric - 1 teaspoon
Sesame seeds - 2 teaspoons
Salt - As per taste
Oil/Butter - 2 tablespoons
Water - As per requirement
Method
Mix all the flours, finely chopped onion and fresh coriander along with all spices powders and knead flour by adding enough water. The dough should be soft. Set aside for about two hours. For making thalipeeth, soak a napkin in water and wring it well. Spread the soaked napkin on a surface and place a fistful of thalipeeth mixture. Dip your fingers in water and tap lightly on this mixture to spread it evenly. Heat a pan and pick this napkin and place the thalipeeth on the hot pan, remove the napkin. Apply oil or butter to the thalipeeth and cover with a lid, allow to cook for about 2 minutes and then filp on to the other side for even cooking. Remove when it is browned well on both sides. Now, repeat the same with the remaining dough.
Thalipeeth is to be served while it is hot and tastes good with homemade butter, curds and matkichi usal. You can serve it with pickles and chutneys too.


Friday, October 16, 2015

MyMusingsSangSpeak-Pet Puja -Club Sandwiches (Vegetarian)

Club Sandwich (Vegetarian)
 Vegetarian club sandwich is easy to make and delicious to taste. It serves as a good, sumptuous breakfast for the health conscious as it has all the right nutrients and is good as a party snack too.

Ingredients
Bread Slices – 6 nos
Green Chutney – 2 teaspoons (5-6 sprigs coriander, 1 green chilly, salt, water)
Tomato Sauce – 2 teaspoons
Full Cream/ Cheese spread – 2 teaspoons
Boiled Potato (peeled and sliced) – 1 no
Cucumber (peeled and sliced) – 1 no
Tomato (sliced) – 1 no
Lettuce/Cabbage (finely chopped) – 3 leaves
Butter (optional) – 1 teaspoon


Method
Toast the bread slices lightly in a non stick pan. Apply cream or cheese spread on one bread slice. Top it with potato slices and chopped cabbage/lettuce. Apply green chutney to the next bread slice and place on top of it. Now place cucumber and tomato slices over it. Apply tomato sauce to the last bread slice and place on top of it. Now toast/grill the sandwich and make it a nice golden brown on both sides. You may use butter if you wish to while toasting. Serve hot with tomato sauce as accompaniment.


Note - You can vary the salads as per your wish, also the chutneys and spreads. The non vegetarians may add salami slices in place of potato.


Thursday, July 16, 2015

MyMusingsSangSpeak-Pet Puja - Chicken Mayonnaise Sandwiches

Chicken Mayonnaise Sandwiches

Chicken Mayonnaise Sandwiches are tasty treats and all those from Pune are sure to vouch for the yummy ones served by Marzorin. The recipe is simple and does not require much effort. I prefer to use homemade mayonnaise for my sandwiches. Ready made mayonnaise is also available readily in the market nowadays and can be used. 


Ingredients
Chicken – 400 gms
Bread slices – 10 nos
Mayonnaise – 75 gms approx
Method
Cook chicken with little salt and water in pressure cooker for about 15 minutes. Remove from the cooker, strain the water (this stalk can be used for soup) and separatethe bones from the chicken to make it boneless. Shred the chicken to small pieces. Remove the sides of the bread slices and heat lightly in a non stick pan. Apply mayonnaise and spread the shredded chicken and make a sandwich. You may use grated cabbage also in addition to chicken if you like.

http://mymusings-sangita.blogspot.in/2015/07/pet-puja-homemade-mayonnaise.html

MyMusingsSangSpeak-Pet Puja - Homemade Mayonnaise

Homemade Mayonnaise
The homemade mayonnaise is one easy recipe and stays for about a week in the fridge. Nowadays, readymade mayonnaise is available in the market, but, I prefer the homemade one as it does not have preservatives and is tastier and you can make it to suit your tastes perfectly. I learnt to make mayonnaise from a dear friend of mine and I am sharing her recipe. I have modified and made some changes though. I use whole egg for my mayo; the traditional mayo uses only the egg yolk. Mayonnaise comes in very handy as a spread for variety of sandwiches and salads.

Ingredients
Egg – 1 no
Salad oil – 1 cup
Salt – As per taste
Sugar – 2 teaspoons
Vinegar/Lemon Juice – 1 teaspoon
Black Pepper Powder – ½ teaspoon
Mustard Powder – ½ teaspoon

Method
Beat egg with a whisk option in electric mixer. Add little oil at a time and keep whisking till all oil is used and a good emulsified mixture is formed. Add salt, sugar, vinegar/lemon juice, black pepper powder and mustard powder and give a final whisk. Mayonnaise is ready to use, store it in a clean jar and refrigerate and use as and when required.

Note – Mayonnaise can be used in a variety of sandwiches along with boiled chicken, tomatoes and cucumbers, cabbage and carrots and so on. Russian salad can be made by using boiled potatoes, peas and beans, and carrots, apples, grapes dressed in mayonnaise. You can make various coleslaw too using cabbage and lettuce etc. If salad oil is not readily available, use any refined oil.
People with egg allergies, be careful. Some people are allergic to uncooked eggs too, so be careful if you are eating mayo prepared with egg.  

Thursday, July 2, 2015

MyMusingsSangSpeak-Pet Puja - Chicken Sandwiches

Chicken Sandwiches

Chicken Sandwiches taste utterly delicious and are simple to make too. These sandwiches give the taste of chicken patties. The chicken filling can be made and stored in the fridge for up to 5-6 days and used as and when required. You can also make kathi rolls, tacos or burgers with this filling.


Ingredients
Chicken – 500 gms
Onions – 2 large
Tomatoes – 2 large
Ginger Garlic paste – 1 and ½ teaspoon
Garam Masala – 1 teaspoon
Red Chilly Powder – ½ teaspoon
Coriander – 7-8 sprigs
Salt – To taste
Oil – 2 tablespoons
Bread – 10 slices
Butter – 25-30 gms
Mayo/cheese spread (optional) – 30 40 gms
Tomato sauce – For accompaniment


Method 
Cook the chicken in little water in a pressure cooker. Remove the stalk and debone the chicken and shred it. Slice onions and tomatoes. Wash coriander and chop finely. Heat oil in a pan and add onion and fry till it caramelizes to a nice golden brown. Then add tomatoes and ginger garlic paste and fry for about 2-3 minutes. Then add shredded chicken, garam masala, chilly powder, salt and stir well. Finally add chopped coriander and remove from fire.
For sandwiches, apply little butter to the bread slices and toast them lightly, spread the mayo/cheese, chicken filling and toast till they become crispy. Chicken sandwiches are ready to be served.

Note
You can add mint leaves or spring onions for variation.The chicken sandwiches form sumptuous breakfast foods, also good to carry in tiffins and are tasty snacks for party as well.


Thursday, June 25, 2015

MyMusingsSangSpeak-Pet Puja - Mushroom Capsicum Sandwiches

Mushroom Capsicum Sandwiches
The Mushroom Capsicum Sandwiches were a regular in my daughter’s tiffin during her school days. Her friends would just pounce on her tiffin the day she carried these. I generally made different kinds of sandwich fillings with different kinds of vegetables like sweet corn, carrot, capsicums, mushrooms, potatoes etc and these can be stored in the fridge for minimum week and you can make sandwiches or rolls using them as and when you wish. You can alternate the various fillings by adding cheese, mayo, toamato sauce, sour cream or any other chutneys and sauces of your liking. The sandwiches can be toasted or grilled, or you can opt to make an open sandwich (like a pizza). This recipe makes a good breakfast or you can supplement it as a cocktail snack too.
 Ingredients
Mushrooms (button variety) – 200 gms
Capsicum – 1 medium
Onion – 1 medium
Butter – 75 gms
Garlic – 10-12 cloves
Mixed Herbs – ½ teaspoon
Cheese (Optional) – 50 gms
Salt – To tatse
Tomato Sauce – 3 tablespoons
Red Chilly Powder/Flakes – ½ teaspoon
Bread (White/Brown) – 10 slices


Method
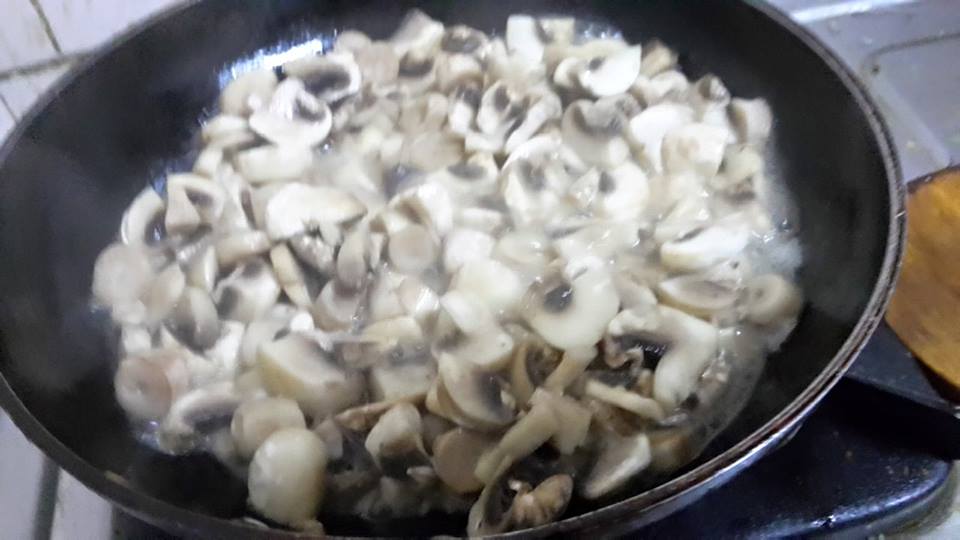
Wash and cut mushrooms. Heat little butter in a pan and sauté the mushrooms till all water dries up. Add crushed garlic and red chilly powder and stir for a minute and set aside. Slice the onion and capsicum. Heat little butter and sauté onions till they turn soft, then, add capsicum and stir for about 2-3 minutes. Add salt, mixed herbs and cooked mushrooms, stir for about 2 minutes and remove from fire. Now heat a non stick pan and toast the bread slices with little butter. Place a cheese slice, some of the mushroom capsicum filling on one bread slice and apply tomato sauce to one slice and make a sandwich. Toast this on low flame till the bread becomes crispy. Sandwiches are ready to be served.

Note - You can use cheese spread or slices or grated hard cheese. You may use red and yellow bell peppers too in place of capsicum.


MyMusingsSangSpeak-Pet Puja - Palak Kebab

Palak(Spinach) Kebab


Palak Kebab is one of my own recipes that I happened to experiment and make. It is an easy to make, nutritious, tasty finger snack. They were a hit when I used to make them for parties. It has been long time since I have been entertaining on large scale, so I just stopped making them till I was reminded by a friend of mine “ Mrs Jadhav, aapke banaye hue Palak Kebab kitne badhiya lagte the”. So friends, here is the recipe for you all.


Ingredients
Palak(Spinach) Puree - 1 large cup
Boiled Potatoes – 2 medium sized
Bread Slices – 3 nos
Ginger Garlic Green Chilly Paste – 1 teaspoon
Garam Masala – ½ to ¾ teaspoon
Salt – As per Taste
Oil- For Frying


Method
For Palak Puree- Wash half a bunch of spinach leaves, cut them and boil in water for about 5 minutes. Strain the water and allow to cool, afterwards, make a paste in mixer to form a smooth puree. Make coarse powder of bread slices in the mixer and peel and mash the potatoes well. Mix spinach puree, mashed potatoes, bread crumbs, ginger+garlic+green chilly paste, garam masala and salt well to form smooth dough. Make small kebabs of this mixture and shallow fry with little oil in a non stick pan. Turn alternate sides and the kebabs will become brown and crispy. Remove, put on a tissue to remove excess oil and serve hot with sauce/chutney of your choice. 

Note – You can deep fry these kebabs. Whether you shallow fry or deep fry, they do not soak in much oil. For variation, you may puree green peas too and add to the mixture.

Monday, April 6, 2015

MyMusingsSangSpeak-Pet Puja - Bread Rolls

Bread Roll

Another favourite bread snack, the bread rolls, yummy and one could just go on eating. Health conscious people, please give this one a miss. I learned to make bread rolls in our cooking class in school, the recipe was taught by Mrs Lazarus, and the filling was that of coconut chutney with sweet sour flavouring. My mom made bread rolls using mutton kheema stuffing. I use the most basic filling, that of the humble aloo(potato) subji. 

Ingredients
Bread Slices – 10 nos
Potatoes – 5-6 medium sized
Onions – 2 medium
Green chillies – 3-4 nos
Curry leaves – 10-12 nos
Asafoetida – A pinch
Cumin seeds – ½ teaspoon
Mustard Seeds – ½ teaspoon
Turmeric Powder - ½ teaspoon
Ginger, garlic, coriander paste – 1 teaspoon
Chopped Coriander Leaves – 2 tablespoons
Lemon Juice - 1 teaspoon
Sugar -1 teaspoon
Salt – As per Taste
Oil (for Subji) – 2 tablespoons
Oil (for frying) – 2 cups approx
Water - for soaking bread slices

 Method
 Boil the potatoes, peel and slice fine. Heat oil in a pan, temper it with asafoetida, curry leaves, mustard and cumin seeds and chopped green chillies. Add chopped onion and stir fry till it becomes slightly golden brown. Add ginger, garlic, coriander paste, potatoes, turmeric powder, salt, sugar, lemon juice and mix well. Cover with lid for about 2 minutes and finally add chopped coriander leaves. Remove from fire and set it aside.
Take water in a plate or broad based utensil. Dip one bread slice in water at a time, place it between both palms and squeeze out the extra water. Take a spoonful of the aloo subji and place it in the centre of the slice and close from all sides to make it into a roll. Make all the rolls and set aside. Heat oil in a pan till it is smoky hot, lower the flame and fry the bread rolls till they turn an even golden brown from all sides. Remove the bread rolls on paper to remove excess oil and serve with green chutney or tomato sauce.

Note
Variations could be filling of many kinds like sweet corn plus cheese, chicken kheema or vegetables of your choice.


Monday, November 24, 2014

MyMusingsSangSpeak-Pet Puja- Green Chutney for Sandwiches

Green Chutney
This green chutney is made from all fresh ingredients and tastes very good as sandwich spread. The hard core Puneites will be able to relate this taste to that of the chutney in  the most familiar and famed Marzorin sandwiches. Even I had always tried to peep in the Marzorin kitchen to find the secret of this chutney. They had these nauwari(9 yard sari) clad women grinding huge amounts of this chutney on flat grinding stones and am sure that this was the secret. My recipe is quite close to the chutney as found in the vegetable sandwiches of Marzorin. 
I used to pack these vegetable sandwiches for my husband when we were posted in Delhi. His colleague would literally pounce and run away with the tiffin. The colleague's wife took the recipe from me and later complained that it did not turn out to be as tasty, she had the grouse that I had not disclosed some secret ingredient to her. Friends, I have experimented a lot to arrive at this particular recipe. It is a lot like my mother used to make. The tatses might be varying due to variations in adding salt, sugar, lemon juice or green chillies. My mother loved spice so she added more of chillies. I like sweet sour taste, so I add combo of sugar and lemon juice. The Marzorin chutney is a more sweeter version. You can suit your taste buds and make variations too.


Ingredients:
Fresh coconut grated- One cup
Coriander sprigs- 10-12
Garlic- 7-8 cloves
Green chillies- 1 or 2 as per taste
Lime juice - 1 teaspoon
Salt- To taste
Sugar- To taste
Water - 50 ml

Method:
Grind all the ingredients in chutney jar to a fine consistency.
The green chutney can be used in sandwiches as well as an accompaniment with fried snacks.